
The Importance of Soil Testing in Organic Farming
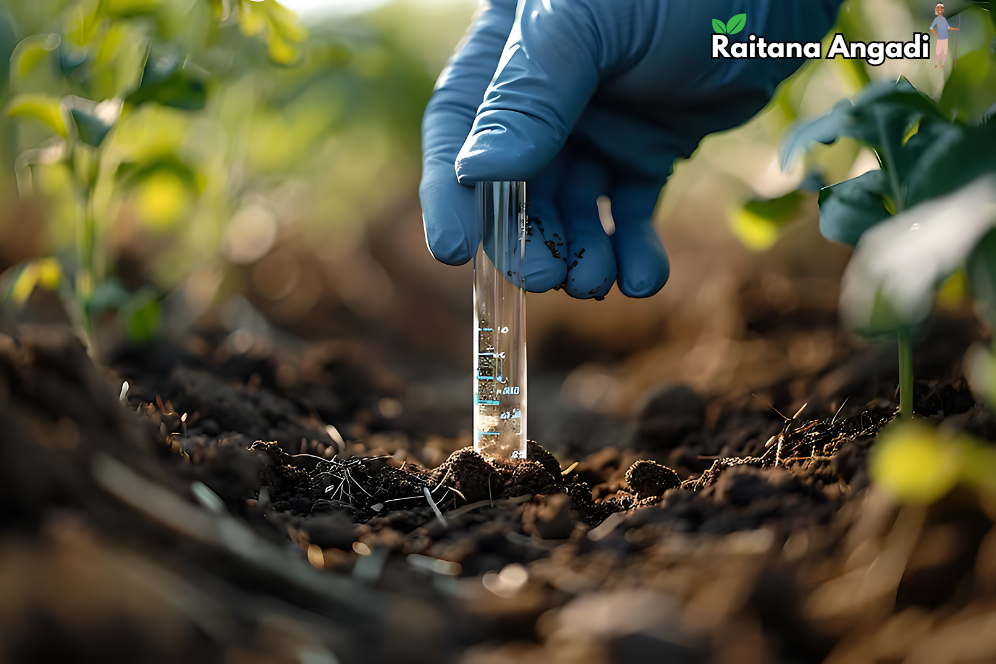
Soil health is the foundation of successful organic farming. Understanding the composition and nutrient levels of your soil is crucial for making informed decisions about crop management, fertilization, and soil amendments. Soil testing provides valuable insights into soil pH, nutrient levels, and organic matter content. Here’s a guide on how to effectively test your soil and use the results to enhance your farming practices.
Why Soil Testing Matters
- Optimize Crop Growth: Knowing the nutrient levels in your soil helps you apply the right type and amount of fertilizers, ensuring that crops receive the necessary nutrients for optimal growth.
- Enhance Soil Health: Soil testing identifies deficiencies and imbalances, allowing you to amend the soil to improve its structure, fertility, and overall health.
- Increase Yields: By providing crops with the ideal growing conditions, soil testing can lead to higher yields and better-quality produce.
- Environmental Protection: Avoiding over-fertilization reduces the risk of nutrient runoff, which can contaminate water sources and harm the environment.
- Cost Savings: Precise application of soil amendments based on test results can save money by reducing unnecessary input costs.
How to Test Your Soil
1. Choose a Soil Test Kit or Laboratory Service
- Soil Test Kit: Available at agricultural supply stores, these kits allow you to test soil pH and nutrient levels at home. They are convenient and provide quick results, though they may not be as comprehensive as laboratory tests.
- Laboratory Service: Sending soil samples to a local extension service or professional laboratory offers more detailed and accurate analysis. These services can test for a wide range of parameters, including pH, macro and micronutrient levels, organic matter content, and more.
2. Collect Soil Samples
- Tools Needed: A clean trowel or soil probe, a clean bucket, and sample containers (provided by the testing service or included in the test kit).
- Sampling Process:
- Select several locations within your field or garden to get a representative sample.
- Remove any surface debris like leaves or mulch.
- Dig a small hole about 6-8 inches deep and take a slice of soil from the side of the hole.
- Place the soil in the bucket and repeat the process at different spots.
- Mix the soil thoroughly in the bucket to create a composite sample.
- Fill the sample containers according to the instructions provided by the test kit or laboratory.
3. Submit Samples or Perform the Test
- Test Kit: Follow the instructions provided with the kit to test the soil. Typically, this involves mixing soil with a solution and comparing the color change to a chart.
- Laboratory Service: Complete any required forms and send the soil samples to the laboratory. Results are usually returned within a few days to weeks, depending on the service.
Understanding Soil Test Results
Soil test results typically include information on the following parameters:
- pH Level: Indicates the acidity or alkalinity of the soil. Most crops prefer a pH between 6.0 and 7.0. Adjust pH using lime (to raise pH) or sulfur (to lower pH) as needed.
- Nutrient Levels: Provides concentrations of essential nutrients like nitrogen (N), phosphorus (P), potassium (K), calcium (Ca), magnesium (Mg), and micronutrients. Use the results to guide fertilization practices.
- Organic Matter Content: Reflects the amount of decomposed plant and animal material in the soil. Higher organic matter improves soil structure, water retention, and nutrient availability. Adding compost or manure can increase organic matter.
- Cation Exchange Capacity (CEC): Measures the soil’s ability to hold and exchange nutrients. Soils with higher CEC can retain more nutrients and are generally more fertile.
Applying Soil Test Results
- Adjust pH: Based on the pH results, apply lime or sulfur to bring the soil to the optimal range for your crops.
- Fertilize Appropriately: Use the nutrient levels to determine the type and amount of fertilizer needed. Organic options like compost, manure, bone meal, and green manure are excellent choices for enriching the soil.
- Improve Organic Matter: If organic matter is low, add compost, cover crops, or organic mulches to enhance soil health.
- Monitor Regularly: Conduct soil tests regularly, at least once every 2-3 years, to monitor changes and adjust your management practices accordingly.
Conclusion
Soil testing is an essential practice for any organic farmer aiming to optimize crop growth, enhance soil health, and ensure environmental sustainability. By understanding your soil’s pH, nutrient levels, and organic matter content, you can make informed decisions that improve your farm’s productivity and sustainability. Invest in a reliable soil test kit or utilize local extension services to get detailed insights into your soil’s health and take proactive steps to nurture it.


Add comment